
A DIY Journey That Ends with a Proud Smile
Thing about drilling into your wall can feel a bit daunting. You open your iSeekBlinds box and see brackets, screws, and a perfectly rolled blind—all ready for you to tackle. It might look like a puzzle at first, but trust us: you’re well on your way to DIY success.
Installing roller blinds isn’t about being a DIY expert—it’s about following a few simple steps, backing yourself, and knowing that help is always close by if you need it. We’re here to guide you through the essentials, with practical tips and real-world advice, so you feel confident every step of the way.
What You Need (Spoiler: It’s Less Than You Think!)
Forget the big toolbox—here’s all you’ll need:
- Cordless drill
- Screws (included in your kit)
- Pencil
- Tape measure
- Wall plugs (if you’re installing into plaster or brick)
- Level (handy but optional)
- Your roller blind kit from iSeekBlinds
That’s it. Nothing fancy—just quality tools and quality products, ready for action.
Know Your Fit: Recess or Face?
Before you get started, it’s important to remember how you ordered your blinds. You’ll be installing either:
Recess Fit
Your blind sits neatly inside the window frame—perfect for a minimalist, streamlined look (ideal for frames with 60mm+ depth).
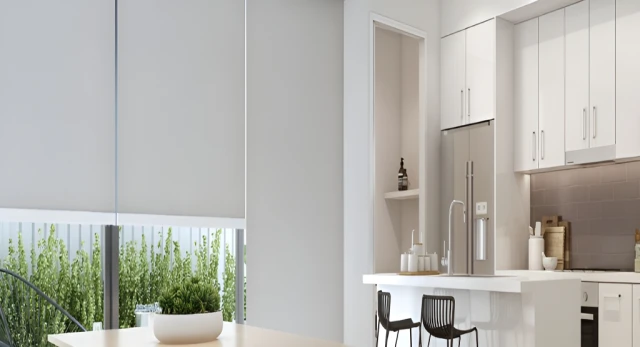
Face Fit
Your blind sits outside the frame, mounted to the wall or architrave. This option gives you maximum coverage, especially great for blocking out light.
This guide covers both styles—just follow the steps for your chosen fit.
DIY Is for Everyone—Seriously!
We hear it all the time:
- “I’ve never installed anything before.”
- “I’m not handy.”
- “What if I get it wrong?”
But just as often, we hear:
“Once I did one window, I was surprised how easy it was.”
“It felt fantastic to do it myself!”
Take a breath—you’ve got this. We’re with you every step of the way.
Step-by-Step: Recess Fit Installation
1 - Unbox and Lay Out Your Kit
Check everything off: blind, brackets, screws. Hold the blind in your hands. That’s yours to install.
2 - Decide the Control Side
Lay your blind as ordered. The control side (chain) is the male bracket; the other end is the female bracket.
3 - Mark Your Bracket Positions
Hold a bracket at the top inside corners of the window frame and mark screw holes with your pencil. Use a level or measure from the sill to keep things even.
4 - Drill Your Pilot Holes
Timber drill bit for wood, masonry for brick. Use wall plugs for plasterboard. This small step ensures a smoother install.
5 - Screw in the Brackets
Line up with your marks and fix brackets in place with your cordless screwdriver—two screws per bracket, firm but not over-tightened.
6 - Click the Blind Into Place
Ensure the chain is even and the flat surface faces the top. Insert the blind into the male bracket (chain end) first, then guide the pin into the female bracket until it clicks.
7 - Test Your Blind
Use the chain to lower your blind fully and install the stop ball at the right point on the chain to prevent over-rolling. Raise and lower the blind to check it glides smoothly.
8 - Install the Safety Cleat
Mount the child safety cleat out of reach to keep cords safe and secure.
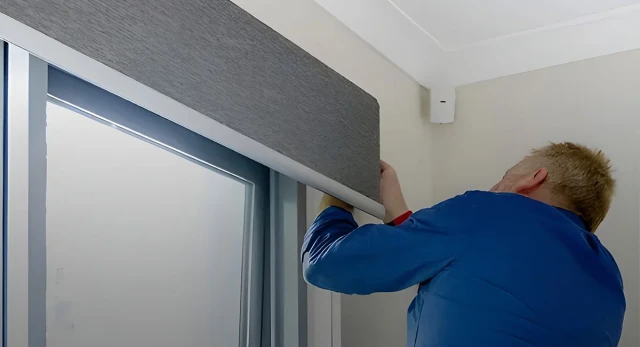
Step-by-Step: Face Fit Installation
1 - Hold Up the Brackets
Position brackets where you want them on the window frame. Mark screw spots with a grey pencil.
2 - Mark and Level
Check bracket positions are level and mark screw holes.
3 - Drill and Attach Brackets
Use wall plugs for plaster and always pilot drill first—especially important for older homes. Secure brackets with your cordless screwdriver.
4 - Install the Blind
Repeat the process: chain end first into the male bracket, then guide the other end into the female bracket until it clicks.
5 - Install the Safety Cleat
Secure the chain to the wall with the included cleat to keep your home safe for kids and pets.
Troubleshooting: Quick Fixes
Blinds rolling unevenly? Brackets feel loose? Chain a bit stiff?
No stress—most issues come down to:
- Brackets not level
- Blind not fully clicked in
- Screws needing a quick tighten
Still stuck? Our team is just a message or call away. We’re here to walk you through it.
You Did It—Take a Moment!
Installing your own roller blinds isn’t just about saving on tradie costs. It’s about putting your stamp on your space and enjoying the pride of a job well done. That first time you pull the chain and watch your blind roll down, take a second to celebrate. You earned it.
Helpful Links
- Full Install Guide on iSeek Blinds
- Roller Blinds Products
- Contact Our Support Team
- Explore our Check Measure Service
Transform your windows with confidence—the iSeekBlinds way. Proudly Australian Made. Proudly supporting your DIY journey.


'%3e%3cline%20id='Line_28'%20data-name='Line%2028'%20y2='200'%20transform='translate(1580.5%205493.46)'%20fill='none'%20stroke='%23f7941d'%20stroke-width='5'/%3e%3cg%20id='Ellipse_50'%20data-name='Ellipse%2050'%20transform='translate(1559%205665.46)'%20fill='%23171717'%20stroke='%23f7941d'%20stroke-width='5'%3e%3ccircle%20cx='21.5'%20cy='21.5'%20r='21.5'%20stroke='none'/%3e%3ccircle%20cx='21.5'%20cy='21.5'%20r='19'%20fill='none'/%3e%3c/g%3e%3c/g%3e%3c/svg%3e)