

If you’ve ever wondered how to install roller blinds, you’re in the right place. With the right tools, clear steps, and a little confidence, installing roller blinds can be easier than you think. At iSeekBlinds, we make DIY simple — so you can achieve a professional-looking finish without hiring a tradie. Follow our practical guide and enjoy a fresh, sleek look for your windows in no time.
Why DIY Roller Blind Installation is a Great Option
DIY Roller Blind Installation Comes with Numerous Benefits:
Whatever you’re doing, a quick refresh of one window or the entire home, you’re in charge!
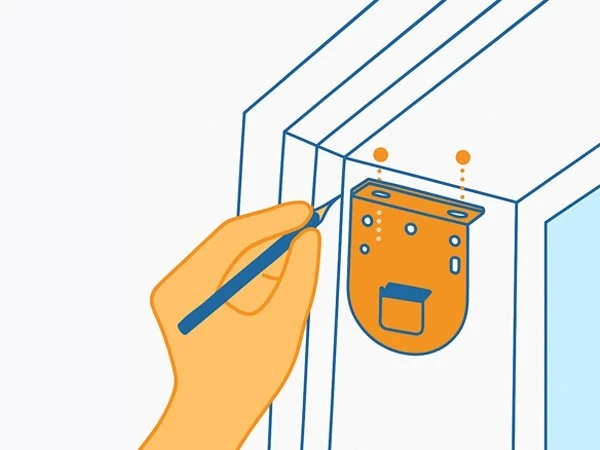
Step 1: Mark the Bracket Position
Hold the brackets up against the window frame or architrave where you want them to be installed. Use a grey pencil to mark the locations for each screw.
Step 2: Pre-Drill Holes (Optional)
If you are working with older wood or fragile surfaces, it’s a good idea to pre-drill pilot holes at the marked positions to prevent the wood from splitting.
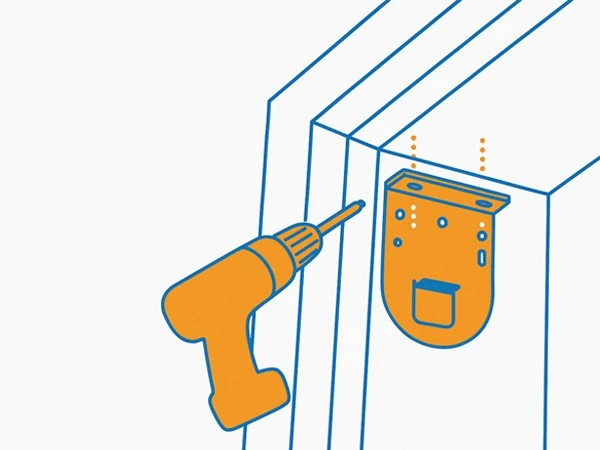
Step 3: Fix the Brackets
Align the bracket with your screw marks. Use a cordless screwdriver to securely attach each bracket in place.
Step 4: Prepare the Blind
Before installing the blind, ensure that the chain hangs evenly on both sides. Verify that the flat side of the blind is facing up.

Step 5: Insert the Blind
Start by inserting the chain end of the blind into the male bracket. While holding this end in position, move to the other side. Push the spring-loaded pin into the female bracket until you hear a satisfying click.
Step 6: Check for ‘Float’
Ensure the blind has about 1.5mm to 2mm of side-to-side movement between the brackets. If it feels too tight, the blind may not operate smoothly. Adjust the bracket positions or extend the pin end if needed.
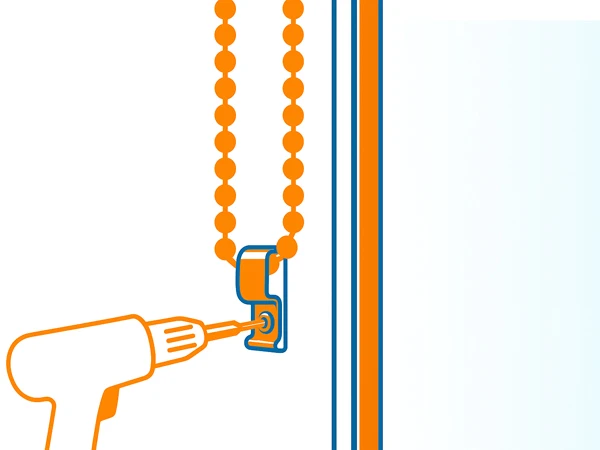
Step 7: Add the Stop Ball
Use the chain drive to lower the blind all the way down. Install the stop ball on the chain just before it enters the chain drive to prevent it from rolling too far.
Step 8: Add Finishing Touches
For blinds mounted on the outside, slide the bracket covers over the exposed sides. Install a safety cleat on the wall, out of reach of children, to secure the chain.
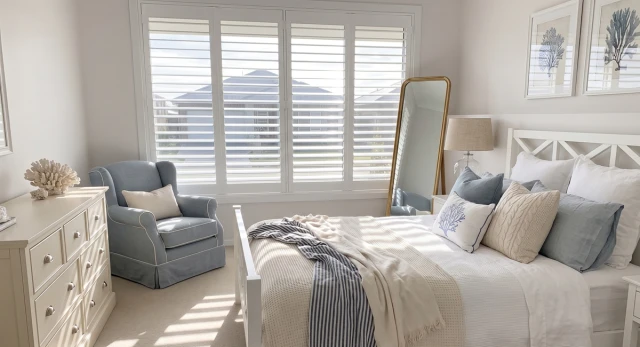
Installation Complete! Your blind is now installed perfectly and securely. Enjoy your fresh new look!
Done installing? Find the perfect fit for your next project — explore our full collection of custom roller blinds designed for every room.


'%3e%3cline%20id='Line_28'%20data-name='Line%2028'%20y2='200'%20transform='translate(1580.5%205493.46)'%20fill='none'%20stroke='%23f7941d'%20stroke-width='5'/%3e%3cg%20id='Ellipse_50'%20data-name='Ellipse%2050'%20transform='translate(1559%205665.46)'%20fill='%23171717'%20stroke='%23f7941d'%20stroke-width='5'%3e%3ccircle%20cx='21.5'%20cy='21.5'%20r='21.5'%20stroke='none'/%3e%3ccircle%20cx='21.5'%20cy='21.5'%20r='19'%20fill='none'/%3e%3c/g%3e%3c/g%3e%3c/svg%3e)