'%3e%3ccircle%20id='Ellipse_59'%20data-name='Ellipse%2059'%20cx='3'%20cy='3'%20r='3'%20transform='translate(11%208.786)'%20fill='none'%20stroke='%23f7941d'%20stroke-linecap='round'%20stroke-linejoin='round'%20stroke-width='2'/%3e%3cpath%20id='Path_82'%20data-name='Path%2082'%20d='M14,2A10,10,0,0,0,4,12a8.048,8.048,0,0,0,1.875,5.625L14,27l8.125-9.375A8.048,8.048,0,0,0,24,12,10,10,0,0,0,14,2'%20transform='translate(0%200)'%20fill='none'%20stroke='%23f7941d'%20stroke-linecap='round'%20stroke-linejoin='round'%20stroke-width='2'/%3e%3c/g%3e%3c/svg%3e)


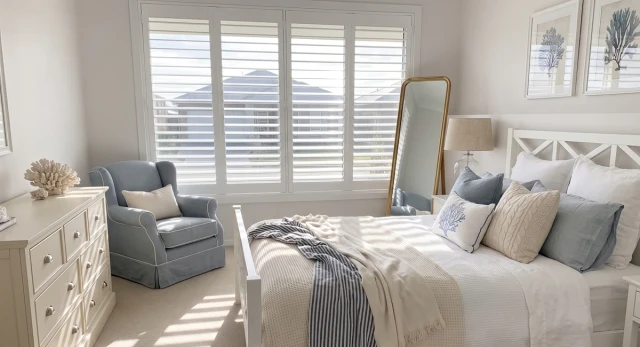
How to measure, choose and install iSeekBlinds PVC plantation shutters with confidence
Plantation shutters can make a room feel clean, structured and finished. They sit neatly at the window. They control light. They improve privacy. They help with airflow. They suit bathrooms, kitchens, laundries, bedrooms, living rooms and street-facing spaces. They also give the home a timeless look that works across classic, coastal, Hamptons and modern interiors. But many homeowners still ask the same question. Can I install plantation shutters myself? With the right product, careful measuring and clear instructions, DIY plantation shutters are absolutely achievable. The key is preparation. You need to choose the right shutter material, measure each window correctly, understand your frame options, plan your panel layout and take your time during installation.
This practical guide explains how DIY plantation shutters work for Australian homes, what to consider before ordering, and how iSeekBlinds supports you through the process.
1. What Are DIY Plantation Shutters?
DIY plantation shutters are custom-made shutters supplied for homeowners to measure and install themselves. Instead of booking a full measure-and-install service, you take your own measurements, place your order online and install the shutters using clear instructions and support. iSeekBlinds are made to measure and designed for DIY installation. They are supplied as PVC plantation shutters with adjustable louvres, a clean framed finish and practical light, privacy and airflow control. The shutters are not a one-size-fits-all product. They are custom made to suit your window measurements and selected configuration. That is why measuring matters. The better the preparation, the better the final result.
2. Why Choose PVC Plantation Shutters for DIY?
Moisture-resistant PVC plantation shutters are a practical choice for Australian homes and everyday use. They are especially useful in moisture-prone rooms such as bathrooms, kitchens and laundries. That matters because not every window furnishing is suited to humidity, steam or regular cleaning. PVC plantation shutters are also easy to maintain, making them a good option for family homes, busy spaces and rooms where fabric may not be ideal. iSeekBlinds PVC shutter blades include an aluminium core for added strength and stability. Their smooth finish is also easy to maintain with regular dusting and a soft, damp cloth. PVC plantation shutters suit:
- •
Bathrooms
- •
Kitchens
- •
Laundries
- •
Living rooms
- •
Bedrooms
- •
Home offices
- •
Street-facing rooms
- •
Coastal-style homes
- •
Hamptons-style homes
- •
Modern and minimalist interiors
For a broader product overview, read the Complete Guide to PVC Plantation Shutters .
3. What Makes iSeekBlinds Shutters DIY Friendly?
DIY only works when the product and support make sense. iSeekBlinds PVC plantation shutters are designed for a practical DIY measuring and installation process. You measure your windows. Choose your shutter colour. Select your mount and frame. Choose your panel layout. Order online. Then install using the available guides and videos. The iSeekBlinds DIY approach includes:
- •
Custom-made shutters
- •
Step-by-step measuring guides
- •
Step-by-step installation guides
- •
How-to videos
- •
Free shutter samples
- •
Product configuration options
- •
Friendly support when needed
- •
Free video consultation support where suitable
This is useful because plantation shutters need more planning than a basic blind. You are not only measuring width and drop. You also need to consider recess depth, frame type, panel layout, obstructions, mid rails and how the window opens. The process is very achievable, but it should not be rushed.
4. Start with the Room
Before measuring, think about the room. The best shutter setup depends on how the room is used. A bathroom needs privacy, moisture resistance and easy cleaning. A kitchen needs light control and a surface that can be wiped down. A bedroom needs privacy and comfort. A living room may need glare control and street-facing privacy. A home office may need light control without making the room feel dark. A laundry needs practicality. A nursery or kids' room needs a safe, chain-free window furnishing. Plantation shutters work well when you want:
- •
Adjustable privacy
- •
A clean built-in look
- •
No hanging cords or chains
- •
Easy maintenance
- •
Light and airflow control
- •
A long-term window furnishing
- •
A structured design feature
- •
A finish that suits wet areas
For room-by-room advice, read Best Rooms for Installing Plantation Shutters.
5. Choose the Right Shutter Colour
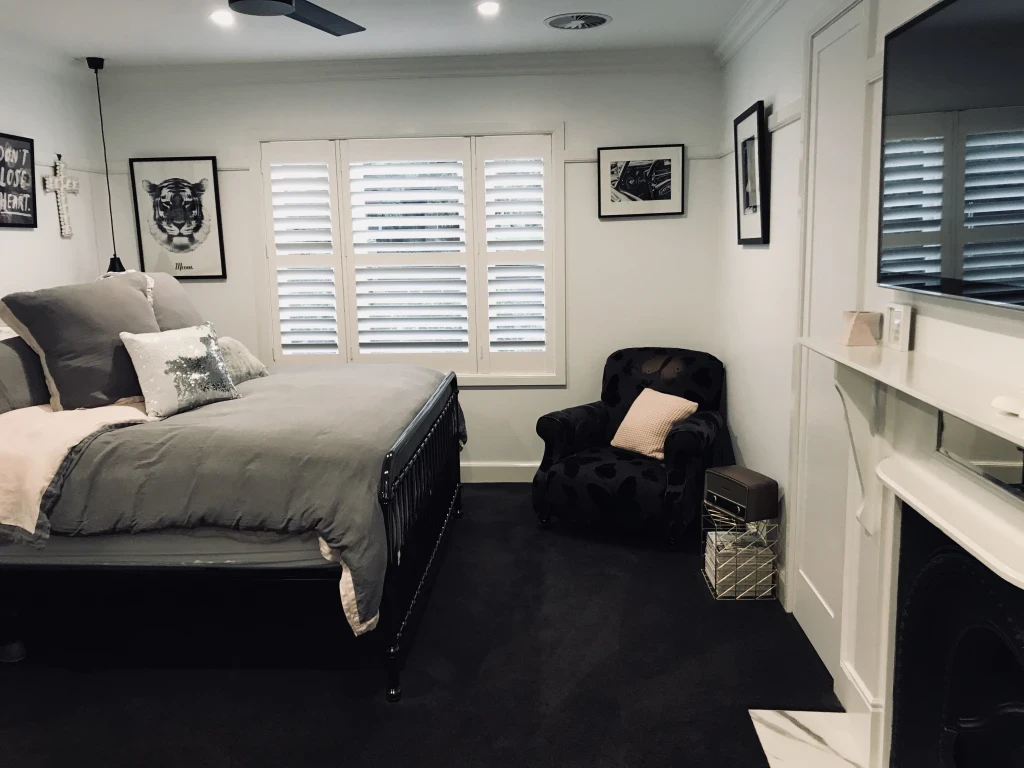
iSeekBlinds PVC plantation shutters are available in three white finishes:
The right white depends on your home. Cool White can suit crisp white walls, cooler greys, black accents and modern interiors. Warm White can suit timber, cream, beige, warm flooring and softer coastal palettes. Neutral White can suit homes that mix warm and cool finishes. Do not choose colour from a screen alone. Order Plantation Shutter Samples and check them in the room. Hold the samples beside:
- •
Walls
- •
Window frames
- •
Flooring
- •
Tiles
- •
Cabinetry
- •
Benchtops
- •
Furniture
- •
Existing curtains or blinds
Look at the colour in morning light, afternoon light and at night. White is not always just white. The right tone makes the shutters feel like they belong.
6. Understand Inside Mount and Outside Mount
One of the first big DIY decisions is how the shutter will be fitted. Inside mount, also called recess fit, sits inside the window opening. It creates a clean, built-in look and can suit windows with enough depth and clear space around handles or locks. Outside mount, also called face fit, sits outside the window opening or over the surrounding frame. It can suit shallow recesses, uneven frames or windows where there is not enough depth for an inside mount. Both options can look good. The right choice depends on your window. Before deciding, check:
- •
Recess depth
- •
Window handles
- •
Locks
- •
Winders
- •
Flyscreens
- •
Tiles
- •
Architraves
- •
Skirting
- •
The window opening direction
- •
The look you want in the room
For detailed instructions, use the Measure Plantation Shutters guide before ordering.
7. Check Your Window Depth
Window depth is important for plantation shutters. For an inside mount, the recess needs at least 65mm of clear depth so the frame and 89mm louvres can operate correctly. If the recess is too shallow, outside mount may be the better choice. Do not guess this step. Measure the depth carefully and check for anything that could get in the way. Common obstructions include:
- •
Window winders
- •
Handles
- •
Locks
- •
Security fittings
- •
Tiles
- •
Screens
- •
Uneven reveals
- •
Older window frames
A window may look suitable at first, but a handle or lock can affect the final fit. This is why iSeekBlinds recommends checking the full window area before ordering. A good DIY result starts before the order is placed.
8. Choose the Right Frame Type
Plantation shutters can use different frame options depending on the window and mount. iSeekBlinds shutter options may include frame styles such as:
- •
L Frame
- •
Z Frame
- •
U Channel
- •
Direct Mount
- •
L Frame Outside
The frame affects how the shutter sits, how it is installed and how finished the window looks. An inside-mount L Frame is the most common recess-fit option and helps square the frame and panels. A Z Frame sits inside the recess and its bullnose edge wraps slightly onto the wall, helping disguise small gaps around windows that are not perfectly square. U Channel may suit specific internal opening applications. Direct Mount may suit narrow openings where a full frame would reduce blade size or block too much light. Outside L Frame is used for outside mount applications. For most homeowners, the best approach is to follow the measuring guide and choose the option that suits the actual window. The frame is not just a design choice. It is part of the installation method.
9. Plan the Panel Layout
Panel layout has a big impact on how the shutters look and operate. A panel layout should follow the shape and structure of the window. If the window has mullions, fixed sections or opening sections, the shutter panel layout should make sense with them. A simple rule is to keep the layout clean. Too many panels can make the window feel busy and may reduce the view. Fewer panels often look better, as long as they suit the size and function of the window. Before choosing a layout, think about:
- •
How wide the window is
- •
Where the window mullions sit
- •
How the window opens
- •
Whether panels need to open independently
- •
Whether a T-post is required
- •
How much view you want when the shutters are open
- •
How the shutter will look from inside and outside
For style guidance, read Shutter Styles That Suit Aussie Homes.
10. Understand T-Posts
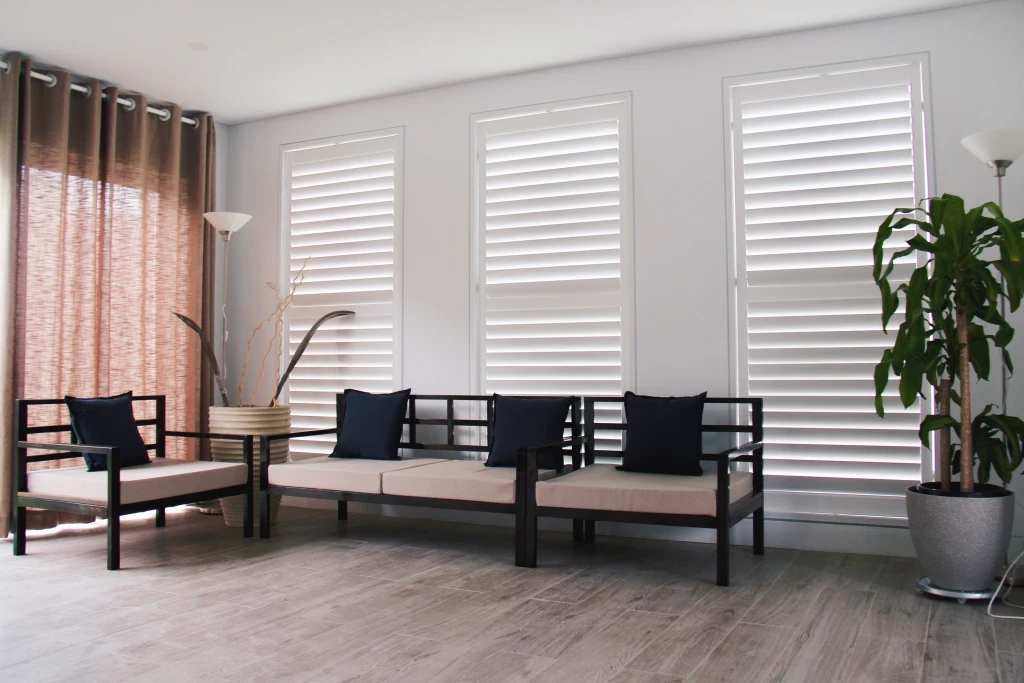
A T-post is a vertical divider used within some plantation shutter layouts. It helps split shutters into multiple hinged panels and can support alignment, strength and operation. T-posts are especially relevant for wider windows or layouts with multiple panels. When planning a DIY order, T-post placement matters because it affects how the shutter panels open and how the finished window looks. A good T-post position usually follows the window. That means it should align with mullions or natural window divisions where possible. Avoid placing T-posts randomly. They should feel intentional. When measuring for T-posts, follow the iSeekBlinds measuring instructions carefully and always measure from the same starting point as directed. This is one of those details where accuracy matters. Small measurement errors can affect the final layout.
11. Understand Mid Rails
A mid rail is a horizontal rail across the shutter panel. It adds strength and can also improve light and privacy control. A mid rail is required when the shutter drop is over 1600mm and remains optional on shorter shutters. They can allow the top and bottom sections of the shutter to feel more balanced and practical. For example, in a street-facing bedroom, you may want to close the lower section for privacy while allowing light through the upper section. A mid rail can make that kind of control more practical. When planning mid rails, think about:
- •
Window height
- •
Where the window lock or mullion sits
- •
Privacy needs
- •
How the room is used
- •
The visual balance of the shutter
- •
Whether the mid rail should line up with existing window details
Do not place a mid rail purely by eye. Use the measuring guide and plan the height carefully.
12. Understand Split Tilt
A tilt rod controls the shutter blades. A split tilt rod allows separate sections of louvres to be controlled independently. This gives more flexibility with light and privacy. For example, the lower blades can be closed for privacy while the upper blades stay open for daylight. This can be useful in:
- •
Street-facing rooms
- •
Bedrooms
- •
Bathrooms
- •
Home offices
- •
Living rooms
- •
Rooms close to neighbours
Split tilt can be selected for flexible light and privacy control and is automatically required when the overall drop, or a blade section above or below a mid rail, exceeds 1200mm. Think about how you will use the room during the day. If you often want light without direct views into the room, split tilt may be useful.
13. Measure in Millimetres
Plantation shutters are precision products. Measure in millimetres. Use a steel tape measure or laser measure. Keep the tape straight and level. Measure each window separately. Even windows that look identical can vary slightly. For inside mount shutters, measure the internal width in three places:
- •
Top
- •
Middle
- •
Bottom
Use the smallest measurement. Measure the drop in three places:
- •
Left
- •
Centre
- •
Right
Use the smallest measurement. For outside mount shutters, measure the outside area the shutter frame needs to cover. Again, take multiple measurements and use the smallest where instructed. This is not a step to rush. Careful measuring is one of the most important parts of the DIY process.
14. Label Every Window Clearly
If you are ordering shutters for more than one room, label every window clearly. This helps avoid confusion when placing the order and when installing. Use room names that make sense. For example:
- •
Main Bedroom - Left Window
- •
Main Bedroom - Right Window
- •
Ensuite
- •
Kitchen Sink Window
- •
Living Room Front Window
- •
Laundry
- •
Study
Take notes as you measure. Record the mount type, frame option, colour, panel layout and any special details. A simple checklist can save a lot of confusion later. DIY plantation shutters are much easier when everything is organised from the start. Download the plantation shutter measure sheet to help you keep a record whilst measuring your windows
15. What Comes with the Shutters?
Your order includes pre-assembled shutter panels and the components required for the selected layout and frame type. Framed installations arrive with the frame in labelled sections for assembly before fitting. Depending on your order, this may include:
- •
Pre-assembled shutter panels
- •
Frame sections
- •
Hinge packers
- •
Screw hole caps
- •
Screw hole stickers
- •
White-head hinge screws
- •
T-post screws
- •
T-post bottom bracket for some 3-sided frames
- •
L-striker plate for some 3-sided frames
- •
Shutter pins
- •
Spare shutter blade
- •
Touch-up paint
The exact contents depend on the configuration you ordered. Before starting installation, unpack carefully and check all parts against the installation guide. Do not start drilling until you know what each piece is for. A calm setup makes installation much easier.
16. Tools You May Need
Before installing, prepare the tools recommended in the iSeekBlinds installation guide. You may need:
- •
Cordless drill
- •
Suitable drill bit
- •
Screwdriver bit
- •
Spirit level or laser level
- •
Packers
- •
Painter's tape or masking tape
- •
Step ladder if required
- •
Clean cloth
- •
Screws suitable for your surface
- •
Caulking gun and gap filler for some inside mount L Frame installs
Fixings matter because different homes have different surfaces. Timber, plaster, brick, masonry and aluminium may need different screws or anchors. The installation guide explains the recommended approach, but you should always make sure the fixing is suitable for the surface you are drilling into. This is part of a safe and secure installation.
17. Assemble the Frame Carefully
For L Frame and Z Frame installations, assemble the labelled frame sections on a flat surface before lifting the frame into position. Lay the frame pieces on a flat surface. Check the labels. Top. Left. Right. Bottom, if it is a 4-sided frame. Use painter's tape to mark the top if needed. This helps avoid confusion once the frame is lifted into position. Gently connect the frame corners and protect the mitred edges. If your shutter includes a T-post, fit it according to the layout and make sure the hinges face the correct way. Do not rush this step. A neat frame setup helps the rest of the installation go smoothly.
18. Keep the Frame Level and Square
Keeping the frame level, square and free from twisting is one of the most important parts of plantation shutter installation. If the frame is not square, the panels may not sit neatly. They may not open and close smoothly. The gaps may look uneven. The finished result may not feel professional. Use a spirit level or laser level. Pack the frame where needed. Check the sides, top and bottom before fixing securely. Do not rely on the existing window opening being perfectly square. Many windows are slightly out. That is normal. The frame setup is where you correct for this and create a clean finished result.
19. Hang the Panels
Once the frame is positioned and secure, the shutter panels can be hung. The panels and frame have matching hinge parts. Line them up carefully and insert the hinge pins. It is helpful to have two people for this step, especially with larger panels. One person can hold the panel while the other aligns the hinges and inserts the pins. Make sure each panel is installed the right way up. iSeekBlinds describes this as shutters “dressing up”, meaning the shutter pushes up to close the blades from the front. This detail matters. If the panel is upside down, operation and appearance may not be right. Take your time and check before moving on.
20. Adjust the Panels
After hanging the panels, check how they sit. Open and close them. Check the gaps. Look at the alignment. Make sure the blades move smoothly. If adjustment is needed, the hinge packers and hinge screws can help fine-tune the position. Small adjustments can make a big difference to the final result. Do not ignore a panel that is slightly low or rubbing. Fix it before finishing the job. A good plantation shutter should feel solid, smooth and neat. That is the reward for careful installation.
21. Finish the Installation
Once the shutters are operating properly, finish the installation neatly. Depending on the frame type, this may include:
- •
Locking hinge screws into place
- •
Fitting screw hole caps
- •
Adding screw hole stickers
- •
Attaching striker plates for some 3-sided frames
- •
Using gap filler around some inside mount L Frame installations
- •
Cleaning the frame and blades
- •
Checking all panels one last time
The finishing stage is what makes the shutters look polished. Do not stop once the panels are hanging. Check the details. Clean the area. Remove marks. Make sure the shutters open and close properly. Step back and view the window from different angles. A clean finish is what makes DIY feel professional.
22. Where DIY Plantation Shutters Work Best
DIY plantation shutters work best where the window is suitable and the homeowner is comfortable measuring and installing with care. They are especially practical in:
- •
Bathrooms
- •
Kitchens
- •
Laundries
- •
Bedrooms
- •
Living rooms
- •
Home offices
- •
Street-facing rooms
- •
Coastal-style homes
- •
Hamptons-style rooms
- •
Modern minimalist spaces
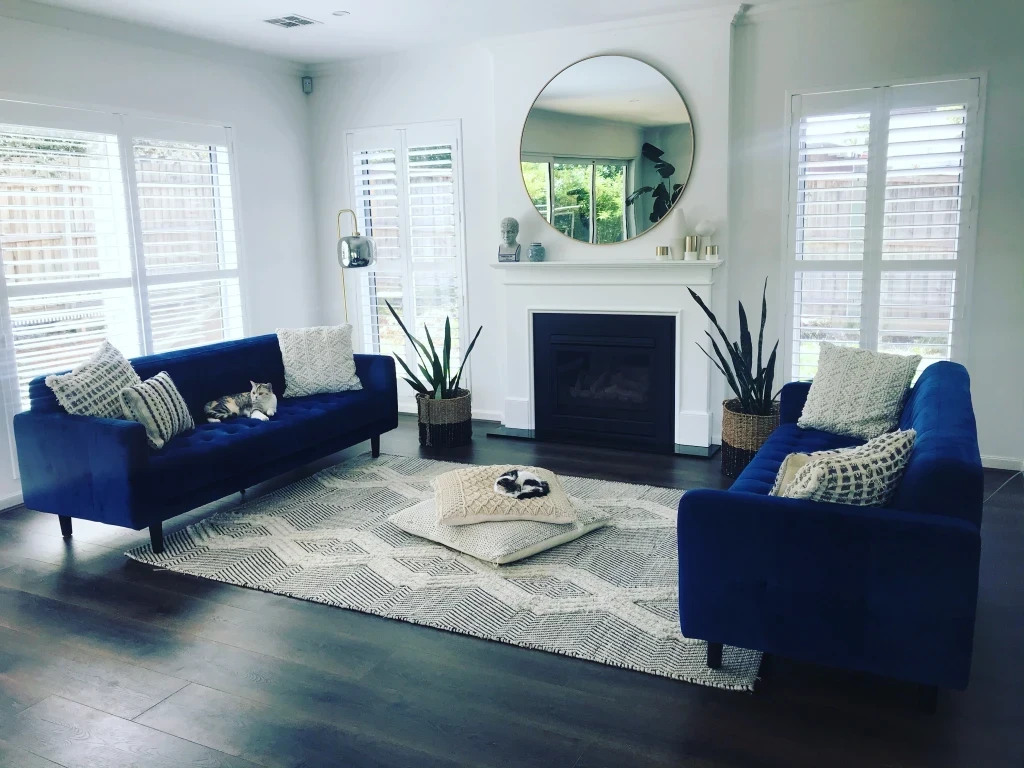
They are a strong choice when you want a custom look without organising an installer. They also suit homes where moisture resistance and easy cleaning matter. For styling ideas, read Shutters in Modern Minimalist Interiors or Mixing Shutters with Curtains.
23. When Another Product May Suit Better
Plantation shutters are versatile, but they are not the right answer for every window. Some rooms may suit another window furnishing better. For example, very wide openings, sliding doors or rooms needing stronger room darkening may suit roller blinds, linked roller blinds, curtains or layered solutions. If budget is the main priority, roller blinds may be the more affordable option. If softness is the main goal, curtains may suit better. If strong room darkening is important, remember that shutters are not a complete blackout product and may be better paired with a blockout blind or curtain. For a practical comparison, read Plantation Shutters vs Roller Blinds. The best window furnishing is the one that suits the room. Not just the one that looks good online.
24. Common DIY Mistakes to Avoid
Measuring Too Quickly
Plantation shutters are made to measure. A rushed measurement can affect the fit, operation and final look. Measure carefully and check each window more than once.
Choosing the Wrong Mount
Inside mount and outside mount create different results. Choose based on window depth, obstructions and the look you want.
Ignoring Handles and Locks
Window hardware can interfere with shutters. Check handles, winders, locks, screens and tiles before ordering.
Choosing Too Many Panels
Too many panels can make the window feel crowded. Choose a layout that follows the window and keeps the view as clean as possible.
Forgetting Samples
Cool White, Warm White and Neutral White can look different in each home. Use samples before choosing.
Not Keeping the Frame Level
A level frame helps the panels sit correctly. Take time with this step during installation.
Starting Without Reading the Guide
Do not start with guesswork. Use the iSeekBlinds measuring and installation guides before drilling.
Quick DIY Plantation Shutter Checklist
Before ordering, ask yourself:
- •
What room is this for?
- •
Does the room need moisture resistance?
- •
Do I need privacy, airflow or light control?
- •
Which white finish suits the room?
- •
Have I ordered samples?
- •
Is inside mount possible?
- •
Is outside mount better?
- •
Do I have enough recess depth?
- •
Are there handles, locks or winders in the way?
- •
Which frame type suits the window?
- •
Which panel layout follows the window best?
- •
Do I need a T-post?
- •
Do I need a mid rail?
- •
Would split tilt be useful?
- •
Have I measured in millimetres?
- •
Have I measured each window separately?
- •
Have I labelled every window clearly?
- •
Have I checked the installation guide?
- •
Do I have the right tools and fixings?
- •
Would a second person make installation easier?
These questions help you prepare properly before placing your order.
Final Thoughts
DIY plantation shutters are a practical option for Australian homes when each window is measured carefully, the configuration suits the opening and the installation guide is followed step by step. They give your rooms a clean, built-in finish. They help control light, privacy and airflow. They are easy to maintain. They suit wet areas when you choose PVC. They work across bathrooms, kitchens, laundries, bedrooms, living rooms, home offices and street-facing spaces. With iSeekBlinds, the process is designed to be achievable for confident DIYers. You can order samples. Choose from Cool White, Warm White and Neutral White. Follow the measuring guide. Use the installation videos. Get support when needed. The result is a custom PVC plantation shutter that looks considered and operates smoothly in your home. The key is not to rush. Plan the room.
Check the window. Measure properly. Choose the right frame. Install level and square. Finish the details. That is how DIY plantation shutters can deliver a polished, professional-looking result without needing a full measure-and-install service. Create a clean, timeless finish with custom .
FAQs
'%3e%3cline%20id='Line_28'%20data-name='Line%2028'%20y2='200'%20transform='translate(1580.5%205493.46)'%20fill='none'%20stroke='%23f7941d'%20stroke-width='5'/%3e%3cg%20id='Ellipse_50'%20data-name='Ellipse%2050'%20transform='translate(1559%205665.46)'%20fill='%23171717'%20stroke='%23f7941d'%20stroke-width='5'%3e%3ccircle%20cx='21.5'%20cy='21.5'%20r='21.5'%20stroke='none'/%3e%3ccircle%20cx='21.5'%20cy='21.5'%20r='19'%20fill='none'/%3e%3c/g%3e%3c/g%3e%3c/svg%3e)